djsb 491 Posted February 4, 2018 Author Share Posted February 4, 2018 (edited) Removed rear tail light in order to fit a new left indicator and inspect any alignment issues or damaged plastic bits. The hardest part was unplugging the connectors. Edited February 4, 2018 by djsb Link to post
makman 975 Posted February 5, 2018 Share Posted February 5, 2018 Nice to see progress made. I enjoy rebuilt threads as you get to learn alongside the builder. Link to post
djsb 491 Posted February 18, 2018 Author Share Posted February 18, 2018 (edited) Just spent a few days TRYING to undo a large dome headed screw (17 below) that holds the tail light together. https://www.bike-parts-honda.com/pieces-honda-detail-71541-71541-NC750XDE-2014-F_30-NC+750+X+ABS+DCT.html It wont budge. I've tried an impact driver and my JIS screwdrivers and I I cant take it off. So, it seems like I'm going to have to fit the R&G tail tidy after all. Maybe the nudge from the accident has damaged the plastics or something. Good job I've found this as it would have been impossible to remove at the roadside if I needed to change the bulb (I'm assuming this is the bolt you have to remove). Got to buy another indicator stay bracket (33412-MGS-D30) and rubber (33413-MGS-D30)unless someone has a spare knocking around they dont need. I cant get to mine as they are stuck in all the plastic gubbins of the tail light. Just found the bracket and rubber from the front left indicator that I've replaced so I can use that. I bought a couple anyway just in case. PS Any recommendations on where to buy the R&G (I'm assuming its part number LP0114BK). They all seem to be around £100 on that auction site. Edited February 18, 2018 by djsb Link to post
pauloski 27 Posted February 18, 2018 Share Posted February 18, 2018 Are you wanting a tail tidy? is your old original unit OK apart from this bolt? i have a tail tidy on my bike that was fitted when i bought it, but i prefer the original look Link to post
CFB 4,601 Posted February 19, 2018 Share Posted February 19, 2018 That screw is an absolute bugger to undo. Done up by a gorilla air gun at the factory! Mine was the same. I finally undid mine by taking the whole assembly off. Undo the 4 Allen screws holding the pillion seat bracket and pull off the rubber holding the tail light connectors. I got it on the bench so I could see what I was hitting and used a centre punch, on the edge of the screw, and hammer to free it. Even WD40 didn't work. A good dollop of copper grease on reassembly too. Link to post
djsb 491 Posted February 24, 2018 Author Share Posted February 24, 2018 Thanks Clive. Took your advice and managed to get the large 16.5mm Panhead screw off. Problem is I rounded off one of the allen headed (6x20mm) screws so I'll have to drill that one out carefully. The part number are as follows SCREW, PAN, 6X16.5 *G 90113-MGS-D30 £2.74 inc VAT {this is the one that got stuck). SCREW, PAN, 6X20 *D 90115-MFL-D20 £2.11 inc VAT (this is the one that I rounded off). RUBBER, TAILLIGHT MOUNTING 83545-KZZ-900 £2.11 inc VAT (replace anyway). More later. Link to post
CFB 4,601 Posted February 25, 2018 Share Posted February 25, 2018 👍 Those Allen scores are a bugger too. They're right in the firing line of all the grit that comes off the road, which files the head up so the key doesn't go all the way in. Apart from filling the head with grease, I can't figure a way of stopping it. You can get plastic caps for Allen screws but there's not a lot of room to get them off. Link to post
djsb 491 Posted March 4, 2018 Author Share Posted March 4, 2018 I drilled the head off the allen bolt and have found that the plastic that the large dome screw goes into has fractured. I didn't here anything snap when I tried to get the screw out. I suspect that the plastic screw housing was fractured in the accident hence why it was moving when I was trying to remove the screw. The replacement part (Base Comp, Tailight 33703-MGS-D31) is £90 including VAT. So I will be fitting the R&G after all. 1 Link to post
CFB 4,601 Posted March 5, 2018 Share Posted March 5, 2018 £90 for that small piece of plastic! Plastic welding not an option? Wouldn't even have to be that neat as it doesn't show. Link to post
kharli 100 Posted March 6, 2018 Share Posted March 6, 2018 I had same trouble , replaced the allen headed useless bolt with a galv hex head bolt I can get a socket on muhahaha. The plastic bit had cracked on mine too but it all fixed together ok so leaving it for now . Put an led light in to replace the failed bulb ..seems ok but riders behind me say in bright sunlight the brake light is poor so I might add and exterior set Link to post
Guest bornagain Posted March 31, 2018 Share Posted March 31, 2018 On 25/02/2018 at 17:01, CFB said: 👍 Those Allen scores are a bugger too. They're right in the firing line of all the grit that comes off the road, which files the head up so the key doesn't go all the way in. Apart from filling the head with grease, I can't figure a way of stopping it. You can get plastic caps for Allen screws but there's not a lot of room to get them off. Apologies, for digging up an old thread - but ... I've usually got some cheap silicone sealant knocking around. Apply it to a clean fastener head and it can be easily peeled / picked off when required. Possibly not great for fasteners you need to access on a regular basis. Regards, Neil Link to post
djsb 491 Posted June 4, 2018 Author Share Posted June 4, 2018 Removed the rear wheel and Exhaust muffler in preparation for removing swing arm and fitting new Wilbers rear monoshock. Found that the rear brake was binding even though new pads and pistons/seals fitted (and brakes bled) a few months ago by a local mechanic. May have to redo the brakes myself if the binding continues. Link to post
djsb 491 Posted June 25, 2018 Author Share Posted June 25, 2018 Got the swing arm off. Not really that difficult apart from the over tightened nut and bolt. It was a bit tricky maneuvering it past the parking brake cable and next time I do the job I will remove the parking brake first. Now I've got to degrease everything and do some rust removal and paint touchup next weekend. More later. 1 Link to post
djsb 491 Posted July 8, 2018 Author Share Posted July 8, 2018 1/ Did some more degreasing of the swingarm with white spirit and washing detergent (not very environmentally friendly-Sorry). Been putting it off as it's a really dirty job. Figured out that you can just pull the sleeves out for the main bearings but not sure about the linkage bearing. I will find out in Monday when I try to regrease the bearings. Their are a few areas where I need to touch up the paint (including the lower left outside edge of the swingarm which has a line of bare metal where the paint has abraded away-Maybe water spray off the chain) which I will do before putting it back on. 2/ Will remove the remainder of the linkage Monday and TRY to remove the Monoshock WITHOUT having to remove any of the bodywork. Then maybe next weekend clean and regrease that as well. 1 Link to post
djsb 491 Posted August 6, 2018 Author Share Posted August 6, 2018 Got the linkage off last week and removed the shock this morning.The top fixing bolt had been assembled without any grease and had rusted into the bracket. Had to soak with PlusGas and get my long torque wrench on it. It screamed a bit as I was moving it but finally knocked it out from the other side. Washed the R&G Shock Sock and the shock itself. No rust on the springs or the shock body but the bottom end of the shock is rusty where it's facing the road. And the lower bearing is a bit stiff. Found a few areas of the frame that need some derusting and painting. Went over a few rusty bits on the tank with the dremel and a wire brush then put a dab of grease on. Still not got the final drive sprocket off yet, so just sprayed it with PlusGas again. I'll probably make a contraption from some wood and a few nuts and bolt to get the sprocket off. Link to post
CFB 4,601 Posted August 6, 2018 Share Posted August 6, 2018 Have you not managed to find a puller to fit? Link to post
djsb 491 Posted January 2, 2019 Author Share Posted January 2, 2019 Just done some spot priming on the swing arm. Hopefully get a top coat (Hammerite Satin Black) on Thurs and another on Friday. 2 Link to post
djsb 491 Posted April 24, 2019 Author Share Posted April 24, 2019 So, after all that effort to paint the swingarm I gave up on the hand painting with Hammerite (this paint is the consistency of cheese and won't last five minutes on the swingarm). I have instead got it shot blasted and powder coated at Triple-s in Bingley. Cost £83.35. Results are well worth the cost. Just got to fit the new labels, re grease the bearings and fit new seals (and the chain plastics/gubbins) over the next day or so. Then I will refit it to the bike. 2 Link to post
djsb 491 Posted June 17, 2019 Author Share Posted June 17, 2019 Swing arm fitted a couple of weeks ago (with OEM shock for time being) so I could move the bike to my parking spot. Drained the petrol tank this morning in preparation for powder coating later. Got to remove the plastic rear fender next (the long plastic cover above the wheel) so I can get access to the fuel pump cable and fuel hose. Link to post
CFB 4,601 Posted June 22, 2019 Share Posted June 22, 2019 On 17/06/2019 at 13:57, djsb said: Swing arm fitted a couple of weeks ago (with OEM shock for time being) so I could move the bike to my parking spot. Drained the petrol tank this morning in preparation for powder coating later. Got to remove the plastic rear fender next (the long plastic cover above the wheel) so I can get access to the fuel pump cable and fuel hose. Glad you have finally got your space back. 🙂 1 Link to post
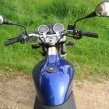
djsb 491 Posted April 18, 2022 Author Share Posted April 18, 2022 (edited) Finally, got to do some work on the bike this morning. I pulled the old front drive sprocket off and fitted the new one (17 tooth). Note to self the bolt needs torquing up properly (54 M-m 10 mm socket). I removed the 30 mm cap in the left-hand alternator cover with a 10 mm hex wrench and placed a 17 mm socket into my torque wrench to give the engine a turn over (making sure to observe that the engine is turned in an ANTI-CLOCKWISE (wrench turned UPWARDS-There is a small arrow actually on the bolt itself). The engine turned freely and there was clearly compression. I turned the engine a few times by hand to make sure. The bike has been standing for quite a while, so I'm relieved that it's not seized. I have decided to NOT get the tank ceramic coated just yet, as the rust on it can be removed quite easily. I started to remove the old exhaust gasket using an old screwdriver as a chisel. I'll need to get the portable Dremel on it later to make sure the new gasket fits properly. I noticed that the centre stand on the right-hand side (other side to the chain) has started to rust, I'm just going to derust it and cover it with grease for now. I gave the fork stanchions a clean with some chrome polish. NO SIGN OF RUST at all. Well worth the cost of getting them done earlier at Philpots in Luton. The rubber items need some kind of treatment, as they are covered in a white powder (same as some of the chassis paint). I'm STILL struggling to remove the cable from the parking brake. Does anyone have any tips on how to remove this cable? More later. Edited April 18, 2022 by djsb 4 Link to post
djsb 491 Posted April 19, 2022 Author Share Posted April 19, 2022 Upcoming around lunchtime today. A 5 hour load (1.2 Amp with a 10 Ohm load)test of the original 8 year old Yuasa battery. The reading are being logged at hourly intervals. There has been a 20 minute warm up period where the voltage rose slightly as the battery warmed up then peaked and began to fall. The load test is using a 120v 30A capacity DC load. More later. 2 Link to post
djsb 491 Posted April 19, 2022 Author Share Posted April 19, 2022 Here are the results Time Voltage Current Power 04:22am 12.519V 1.252A 15.685W 05:20am 12.451V 1.246A 15.518W 06:20am 12.322V 1.233A 15.206W 07:20am 12.166V 1.217A 14.812W 08:20am 11.972V 1.198A 14.344W 09:20am 11.13V 1.112A 12.384W This was measured on a Tenma 72-13210 Programmable DC Load The battery is an 8 year old Yuasa YTZ14S. Needless to say I have just ordered a new one for £78 from here https://www.sportsbikeshop.co.uk/motorcycle_parts/content_prod/47576https://www.sportsbikeshop.co.uk/motorcycle_parts/content_prod/47576 I might do a similar test on the new battery when it arrives. Link to post
Rev Ken 6,327 Posted April 19, 2022 Share Posted April 19, 2022 6 hours ago, djsb said: Here are the results Time Voltage Current Power 04:22am 12.519V 1.252A 15.685W 05:20am 12.451V 1.246A 15.518W 06:20am 12.322V 1.233A 15.206W 07:20am 12.166V 1.217A 14.812W 08:20am 11.972V 1.198A 14.344W 09:20am 11.13V 1.112A 12.384W This was measured on a Tenma 72-13210 Programmable DC Load The battery is an 8 year old Yuasa YTZ14S. Needless to say I have just ordered a new one for £78 from here https://www.sportsbikeshop.co.uk/motorcycle_parts/content_prod/47576https://www.sportsbikeshop.co.uk/motorcycle_parts/content_prod/47576 I might do a similar test on the new battery when it arrives. I'm a great fan of Sportsbike shop. Good prices, and an excellent return service if the item doesn't fit or is not satisfactory - which is free. I also got good advice when they went around checking if a spectacle case would go in a jacket pocket as well as looking at trousers to see how high the knee armour was fitted. Link to post
djsb 491 Posted April 21, 2022 Author Share Posted April 21, 2022 (edited) New battery arrived yesterday. I tested it (on the electronic load, not the bike yet) as soon as it arrived. Just ordered a couple of Avon Storm 3D X-M tyres from Oponeo for £221 total. Should be here next Tuesday. I will make an attempt to fit them myself (and new tyre valves from wemoto) over the bank holiday weekend using my Motion Pro Bead Pro FS (the larger forged steel version) tyre leavers. I'm going to have a go on a spare wheel and tyre over this weekend. Wish me luck. Edited April 21, 2022 by djsb Link to post
Recommended Posts
Create an account or sign in to comment
You need to be a member in order to leave a comment
Create an account
Sign up for a new account in our community. It's easy!
Register a new accountSign in
Already have an account? Sign in here.
Sign In Now